Canadian Rockies
Transportation and Accommodations

Getting There
The Canadian Rockies are a mountain range running through the Canadian provinces of Alberta and British Columbia. In order to reach the Canadian Rockies, it is most common to travel to the city of Calgary first. From Calgary, there are airport transfers to Banff and Canmore, two towns often used as a base or stopping point when exploring the Rockies. The Banff Airporter offers transfer from the airport to hotels in both Banff and Canmore (available in the return direction as well), with shuttles available every hour.
Getting Around
When visiting the Canadian Rockies, you will need a car or van as this will provide you with flexibility to travel around different areas in the Canadian Rockies. Banff, Yoho, Jasper, and Kootenay are all national parks encompassing the Canadian Rockies. Since there is so much to see in the Canadian Rockies, I would recommend using a car to move around to different accommodations during your trip. This will allow you to take advantage of hikes and activities near the accommodations you are at rather than always driving longer distances to explore new areas.
Accommodations
Banff (or Canmore)
Banff and Canmore are located about 15 minutes apart and about 1.5 – 2 hours from Calgary. Banff is a cuter town, but will be more expensive in comparison to Canmore.
The Rimrock Resort Hotel
This is a nice hotel about two miles up the hill from the Banff town centre, and very close to both the gondola in town and the Banff Hot Springs. The hotel is very nice, with beautiful panoramic views of the mountains around, nice accommodations, and friendly staff.
The Fairmont
Luxury hotel in Banff, but outside the main town area, with architecture resembling a castle
Lake Louise
The Post Hotel & Spa
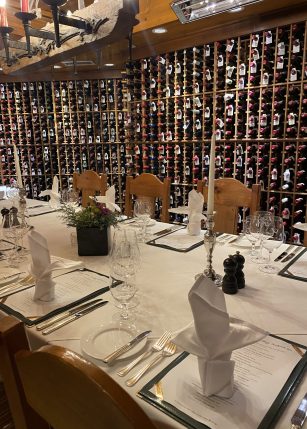
Premiere Swiss style hotel located about 30 minutes from Moraine Lake. The hotel has a main lodge as well as cute little cabins along the river. The service here is excellent and staff are very kind. They offer afternoon tea and are home to Canada’s largest wine cellar. The hotel is equipped with a pool and spa, but note the rooms do not have air conditioning. 95% of the time, this is not an issue, but something to be aware of if visiting when it is warmer. The hotel also has a fantastic restaurant, serving a four course meal, where the menu changes daily.
Moraine Lake Lodge
The location of Moraine Lake lodge is spectacular, sitting right on the lake. As visitors flock to see and hike paths in the area during the day, staying here provides guests the opportunity to have the lake to themselves in the early hours of the morning and late evening.
Field
Emerald Lake Lodge
A more casual set of accommodations, this place is ideal for its location. The hotel consists of numerous individual lodges, each with a few rustic rooms and sits right on Emerald Lake. This allows guests to have the lake to themselves in the mornings and evenings, much quieter than during the day when tourists flock to enjoy the beautiful lake. The rooms have balconies overlooking the lake or property, and the experience has guests feel like they are staying in a cabin in the wilderness. The rooms do not have air conditioning and wifi only works well in the main lobby.
Calgary Airport
Courtyard Marriott Hotel
Located about 1 mile from the airport, this hotel is cheaper than its Marriott property located right at the airport. The hotel provides shuttle services from the hotel to the airport and also reimburses taxis who drop customers off from the airport.
Marriott Hotel
Located at the airport, this hotel is especially helpful for early or late departures from the Calgary airport as it is very convenient to stay close to the airport
Things to do and see


BANFF
Lake Minnewanka Route
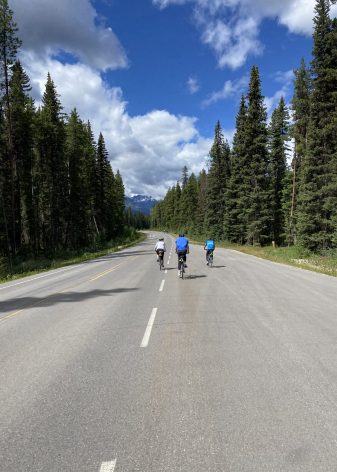
Lake Minnewanka is a beautiful glacial lake and the largest lake in Banff National Park. The Lake used to be a town, but during WWII, the town flooded and washed away civilization. If you have bicycles available, get your bikes out on the road and cycle by the lake, finding a nice spot to enjoy lunch or a snack on the lake.
Mount Norquay Route
If you are up for a climb on your bicycle, try the Mount Norquay route. From Banff, you will follow the main road passed the BANFF sign and soon begin your climb up Mount Norquay. The climb ends when you reach a pull out point for cars where a big field provides a view overlooking the surrounding area.
Hike Johnston Canyon Lower or Upper Falls
Johnston Canyon is located between Banff and Lake Louise. The hike starts from the parking lot, which provides decent washroom facilities and a bistro. Since the hike is more commercialised, the path is often busier during the day especially on nice summer days. Keep this in mind as the hike may take longer simply due to the quantity of people on the trail. The hike to Lower Falls from the parking lot is only about 1 km each direction. If you wish to go further, Upper falls adds about 3 km to the route.
Storm Mountain Lookout
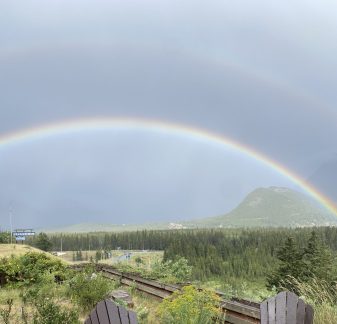
En route to Lake Louise from Banff, Storm Mountain lookout is a gorgeous viewpoint. The ideal way to visit this would be if you are cycling from Banff to Lake Louise town and plan to take a break for lunch. Alternatively, if driving, be sure to make a point to stop at this lookout point. It has a wonderful view of the mountains in the background with the river below and you may even be lucky to catch a train passing by on the tracks running alongside the river.
LAKE LOUISE
Moraine Lake
One of the most iconic and beautiful lakes in the Canadian Rockies, Moraine Lake does not disappoint. The lake has a light blue aqua color to it which looks very clear from up-close. The mountains behind it can be seen reflecting in the gorgeous water.
Note – the lake itself has very limited parking. This is especially important if you are interested in visiting the lake on your own. The parking lot can fill up in the early hours of the morning, so plan a very early wakeup to guarantee a spot. The parking lot has controlled entry, and cars will not be allowed in when the lot is full.
Hiking Moraine Lake
Rockpile Viewpoint
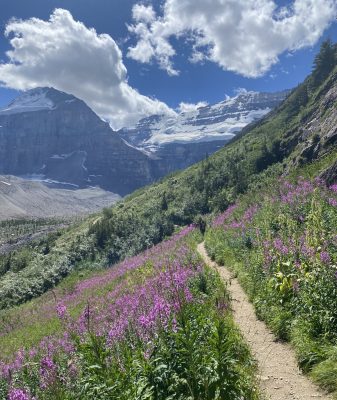
The Rockpile Trail is the best viewpoint of Moraine Lake. From the parking lot, veer left onto the trail and hike up about 5 minutes to be greeted by an incredible view of the lake with the mountains sitting behind it. This is an iconic photo spot, and is absolutely stunning. Getting here early in the morning allows you to observe the lake glistening with the mountains illuminated by the sun in the background. Later in the day, the sun will light up the whole area (lake and mountains) providing a better opportunity to photograph people in front of the lake. Both times of day are worth checking out this viewpoint. Note that since this viewpoint is just off the parking lot and does not require a strenuous hike to reach, it will be crowded as the day progresses.
Lakeshore Trail
Walk around the lake for more views and opportunities to swim in the glacial (and therefore freezing!) lake.
Rockpile & Moraine Lake Meadow Route
4 miles (1,300′ ft elevation)
From the bottom of Moraine Lake, first take a left from the parking lot and hike 5 minutes up to the Rockpile where you will see the iconic view over Moraine Lake. This spot is especially beautiful in the morning where the sun hits the mountains behind the Lake and starts to light up the lake as well. Photographing the lake by itself (without people) is especially beautiful in the morning. Come back and visit the lake in the afternoon when the sun hits differently, and provides better photo opportunities for people with the lake as they will no longer be shaded.
Continue back the way you came to access the rockpile and walk along the lake path past the canoe rentals. Shortly after the canoe rentals, you will have the option to veer right uphill or stick left and walk along the lake. In order to start this hike, be sure to veer right. From here, there are very few turns following which can be missed. This trail is an out and back route, almost entirely up first and down on the way back as you will climb to various viewpoints. The trail starts with a modest uphill, and then soon hits 10 switchbacks. These switchbacks start short and then begin to lengthen. The end of the switchbacks are marked by a singular bench. Take a rest here before veering to the right side of the trail.
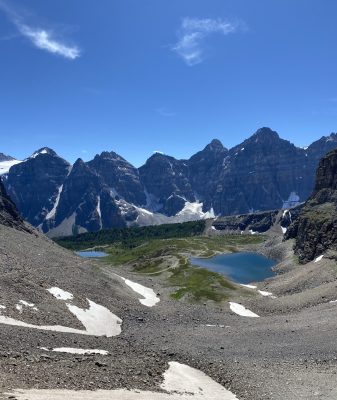
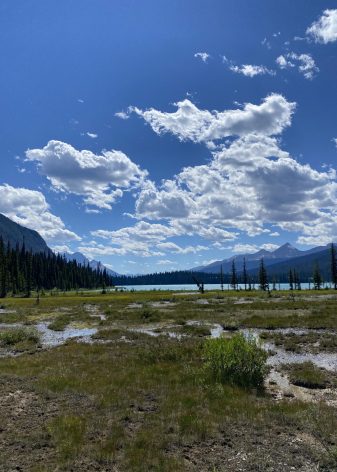
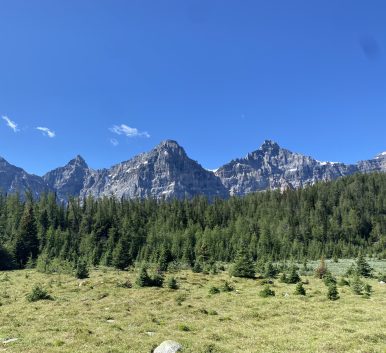
Continue on the trail until you reach a few large meadows. This is your first “end” point, where you will be able to take in views of the Wenkchemna Peaks, 10 in total. At one point, this panoramic view was on Canada’s $20 bill. If you still have energy, continue onto the below option.
Larch Valley Route
5.4 miles (1,800′ ft elevation)
The Larch Valley Route continues the climb up a bit further, 500′ ft to be exact, but more gradual than on the switchbacks previously traversed. Here you will slowly climb until you reach a small lake called Minnestimma Lake. This lake does not offer anything special compared to Moraine Lake, but provides a nice break point where you can see the Sentinel Pass trail. While at the lake, you will have fantastic views of the surrounding mountains. If you are tired here, I would recommend doing the first few minutes of the Sentinel Pass Route to be slightly above the lake and enjoy the spectacular views. Simply climb a few minutes and when satisfied with the view, turn around and return the way you came.
Sentinel Pass Route
7.3 miles (2,400′ ft elevation)
If you are up for another climb, take on the Sentinel pass route. This will be a steep climb up so hiking poles are recommended, and especially helpful if there is snow on the path. Note, it is highly likely there will be snow on some part of this path as there still were spots on the trail covered in snow in early August 2022. The climb up will take about 30 – 45 minutes depending on your speed. The initial ascent is the hardest part as it begins quite steep. Once you reach the switchbacks, these are similar to the switchbacks you hiked earlier and there are only a few before you reach the Sentinel Pass viewpoint. Once you reach the viewpoint, take a seat and enjoy the panoramic views of the Valley of Ten Peaks and Paradise Valley (both where you hiked up from and over the ridge onto the other side of the pass). From here, you will turn around and return to the bottom of Moraine Lake on the same path that took you to the top viewpoint.
Lake Louise
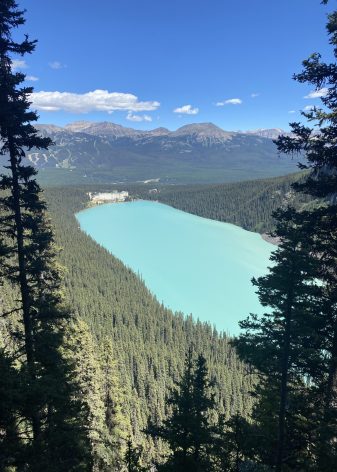
Another famous lake, and one of the most photographed areas in the Canadian Rockies, Lake Louise has a cloudy mint green color which has a very different color than Moraine Lake. The Fairmont hotel sits right on the edge of the lake with unbelievable views. Facing away from the Fairmont and looking out over the lake, you will see the reflection of Mount Victoria in Lake Louise and towering behind it. The area around here is known as the Plain of Six Glaciers as the six glaciers created the surrounding landscape.
Hiking Lake Louise
Plain of Six Glaciers Teahouse Route*
6.8 miles (1,200′ ft elevation)
From the bottom of Lake Louise and behind the Fairmont hotel, begin this hike by walking on the right hand side of the lake (walking counterclockwise). The first mile here starts off very flat as the path stays along the lake. As you reach the back of the lake, the ascent begins. Follow the path towards the Six Glaciers Teahouse which is about 3.4 miles from the starting point. This is an out and back trail and therefore the teahouse marks the halfway point. The Teahouse serves as a nice spot for lunch, with very simple foods like sandwiches, soups, cake, and of course a variety of tea options. After a sufficient break, either return the way you came to follow the Plain of Six Glaciers Teahouse Route or continue onto the below option for a longer hike and opportunity to see something different on the return.
*Add 1 more mile and ~300 ft elevation by hiking past the Teahouse on an out and back trail to the view over Death Trap for a nice view back on Lake Louise as well as an up close view of the Victoria Glacier
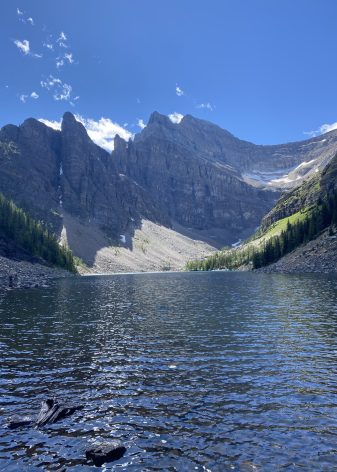
Plain of Six Glaciers Teahouse & Lake Agnes*
8.2 miles (1,900′ ft elevation)
Once wrapped up at the Six Glaciers Teahouse, begin your original descent back on the same path you took to reach the Six Glaciers Teahouse. After about a mile backtracking, there will be an option to veer left up towards Lake Agnes and the Lake Agnes teahouse, or stay right on the path you took up. For this option, veer left towards Lake Agnes. Here the ascent will begin again. This route adds about 700′ ft of elevation. You first walkthrough a narrower path through a meadow on a hill before getting back on a more shaded path. The walk between the two teahouses eventually provides a stunning view over Lake Louise, where the turquoise waters are illuminated in a very different way than it looked when at base level. Be sure to follow signs for Lake Agnes & Lake Agnes Teahouse. There will be a very sharp left to make a final steep uphill climb to the Lake. The climb grows very steep before then transitioning to about 50 manmade stairs. Once at the top of the stairs, you have now reached the Lake and the teahouse. Enjoy the peaceful lake and grab a cup of tea before trekking down the path on the opposite side. This allows you to take a different path down than up. The path does not provide too many views, but you will pass another small lake called Mirror Lake. The path ends right near where you started at the lake near the Fairmont hotel.
*Add 1 more mile and ~300 ft elevation by hiking past the Teahouse on an out and back trail to the view over Death Trap for a nice view back on Lake Louise as well as an up close view of the Victoria Glacier
Plain of Six Glaciers Teahouse or Lake Agnes Teahouse
Climb to either the Six Glaciers Teahouse or the Lake Agnes Teahouse. Be sure to check both the distance AND the elevation gain, as it is not a hike everyone should try to do.
YOHO
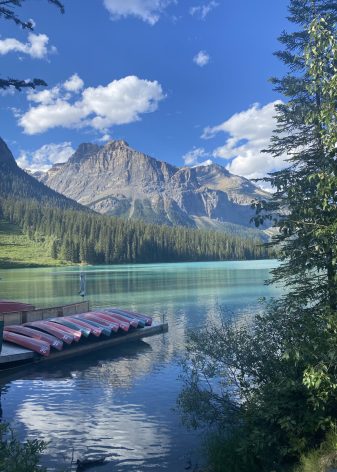
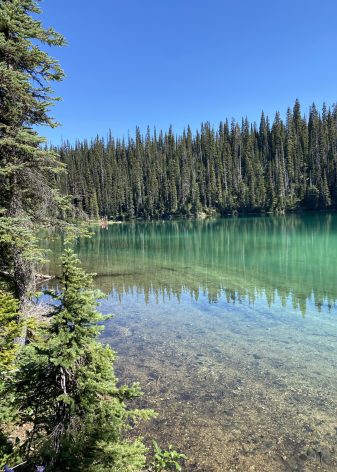
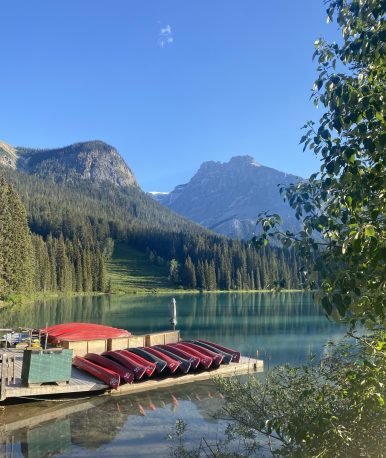
Emerald Lake
Another beautiful Alpine lake, and also differing in color from both Moraine Lake and Lake Louise, it is easy to see where Emerald Lake gets its name as it has an emerald green color to it. The mountains around it reflect into the water, especially beautiful in the morning where the water is flat and calm. In the evening, when the sun is not shining onto the water, it has a cloudier green & blue look to it, beautiful in its own way.
Emerald Lake Hike
3 miles (200′ elevation gain)
More like a walk than a hike, this path takes you around the perimeter of Emerald Lake. The walk takes about an hour and is an easy walk. It provides stunning views of the lake and mountains as the backdrop. If you work up a sweat from the walk or it is a nice warm day, jump in the water to cool off for a swim.
Rent Canoes
Moraine Lake, Lake Louise and Emerald Lake all have canoes available to rent. The rentals can be pricey for 30 – 60 min rentals, but provide a way to enjoy the surroundings from a different perspective.
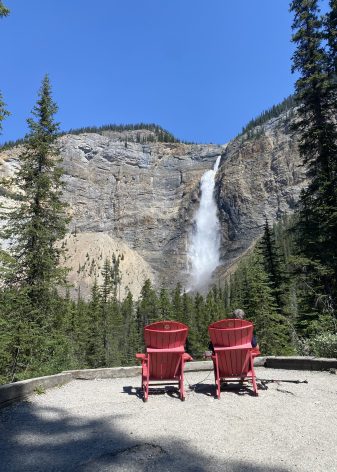
Takakkaw Falls
Check out the Takakkaw falls dropping 384 meters, 7x the height of Niagara Falls in Yoho National Park
Yoho Lake
Hike up to Yoho Lake for a well deserved lunch break. Unlike some of the other lakes, this lake requires a trek to reach it and therefore will not be crowded with other tourists. The lake is much smaller than some of the other lakes noted above, but is peaceful and a pretty shade of green.
Hiking Yoho Lake
Yoho Lake Route
5.7 miles (1,200′ elevation gain)
Start near the viewpoint of Takakkawa Falls (opposite side of the river from where the Falls are) and head towards the trailhead for Yoho Lake. The majority of the incline occurs in the first 1.5 miles of this hike. You will quickly begin to hike up and hit a series of switchbacks which help you gain elevation quickly. Continue on the Yoho Lake path. This is an out and back trail. Once you hit the split point for the Yoho Lake Route vs the Iceline & Highline Route, veer left uphill towards Yoho Lake. Shortly after the divide, the path will progress at a much less steep incline, almost flattening out until you reach the Lake. Yoho Lake marks the halfway point. Take a break here and enjoy the serene emerald green lake. The lake is quite small, but offers a nice spot for lunch or a snack if not too buggy. You can even consider taking a dip in the water as it will be warmer than some of the other lakes in the area. When ready to make your way down, take the same path back, which will start with a flatter path and gradual descent, before the final mile with a steep descent to the end point.
Iceline & Highline Route
6.4 miles (1,600′ elevation gain)
Start out on the Yoho Lake Route, but after about 1 mile, there will be a fork in the path. The left side goes directly towards Yoho Lake on a flatter path, while the path on the right will continue on the Iceline & Highline Route. Follow the path on the right and continue on a steeper ascent. As the ascent finally starts to flatten, you will be out of the woodsy area and hiking in the sun. Here you will have fantastic views of Takakkaw Falls and the glacier behind it. Once you reach a point where there is an option to either continue on the same path or take a sharp left towards Yoho Lake, take the sharp left. Essentially turning around and making a loop to go back towards Yoho Lake, you will now have views of mountains ahead of you. Enjoy the views as you head towards Yoho Lake. At Yoho Lake, you will not return the way you came, and instead continue along the lake to follow the flatter trail. This trail will ultimately meet up with your decision point on the way up where you veered right to stay on the Iceline & Highline Route rather than going directly to Lake Yoho. This route allows you to see different views and trails, but the very beginning and very end will be on the same path. Thus, there will be a steep hike downhill to reach the end point
River Rafting on Kicking Horse River
Company: Wild Water Adventures
Get your adrenaline pumping and take a river rafting trip on Kicking Horse River. Wild Water Adventures is a very well organized, fun, safe, and reputable company to take a River Rafting trip with. Come prepared by wearing your swimsuit and bringing a towel. Wild Water Adventures provides all other clothing you need including a wetsuit, optional fleece and gloves for warmth, water resistant jacket, helmet, water shoes, and life jacket. They also offer a BBQ lunch as an option for purchase (included in the Tradition tour). Each boat has 6 – 8 people on it, including a guide at the centre to steer the boat. Depending on where you are sitting on the boat will impact how wet you get and if you will need to help paddle and steer the boat.
Rapid ratings:
Class 1: no waves, you do not get splashed
Class 2: regular waves, small splashes possible
Class 3: large wages, you will get wet
Class 4: big waves, you will get soaked
Class 5: experts only, not offered by Wild Water Adventures
Class 6: not raftable
They offers a variety of experiences to choose from including:
1) Gentle Whitewater Intro
· Class 1 – 3 rapids
· Daily departures for half day trip
· Introduction and less intense experience
2) Whitewater Exciter
· Class 2 – 4 rapids
· Daily departures for half day trip
· More intense rafting experience with bigger rapids and guaranteed to get soaked
· Most popular trip
3) The Tradition
· Class 1 – 4 rapids
· Daily departures
· Full length trip including lunch
· Variety of rapids
4) Maximum horsepower
· Class 2 – 4
· Different types of rafts used (oar and paddle)
· More experienced required
· Select departure days / times
5) Evening Float trip
· Class 1 – 2
· Casual float trip in the evening to look for wildlife
· Select departure days / times
Food and Drinks
Restaurants
Primrose
Location: Banff
The restaurant in the Rimrock Hotel, this is a mediocre dinner option. The restaurant has a fancy atmosphere, but the food was subpar. Only recommend for convenience if staying at the Rimrock Hotel and looking for an easy meal on the property. They do offer a nice breakfast service, both a la carte and buffet style.
Juniper Bistro
Location: Banff
Located in the Juniper Inn, this restaurant offers a gorgeous view of the surrounding valley and mountains. The food is pretty tasty, especially the short rib, and provides a nice dinner option when visiting Banff.
The Post Hotel Dining
Location: Lake Louise
The Post Hotel has a delicious and fancy restaurant. The restaurant provides a four-course meal experience including choices for a cold appetizer, hot appetizer, main course and dessert. The food is excellent and service matches at a high quality. The menu changes daily, enabling guests to enjoy a different meal if choosing to dine more than one night in the hotel restaurant.
Mount Burgess Dining Room
Location: Field
Situated in the same building as the lobby of the Emerald Lake Lodge, the restaurant provides nice views of the lake itself and offers a variety of nice options for dinner.
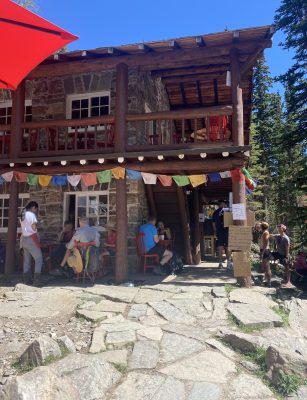
Plain Six Glaciers Teahouse or Lake Agnes Teahouse
Location: Lake Louise
Only accessible by foot (or horse), these two teahouses sit 1000’+ ft above Lake Louise. They offer simple food options including sandwiches, soups, cakes and tea. All supplies are brought here and made by the teahouse employees who live at the teahouse during weekly shifts with the exception of a few deliveries by helicopter.
Other Notes
When to Visit
The best time of year to visit the Canadian Rockies is in the summer, between June and September. At this point, the weather has heated up and started to melt the snow around it, making it possible to hike, bike and raft in the region. The summer months offer longer daylight hours and warmer days to explore. Often the mornings and evenings will be cooler, which explains why many accommodations will not be equipped with air conditioning.
Duration
The duration of your visit to the Canadian Rockies is completely dependent on how much you hope to see and do during your trip. Anywhere from 7 – 14 days would be an ideal amount of time if looking to visit 2 to 3 of the following regions: Banff, Yoho, Jasper, and Kootenay.
Wildlife
Elk, moose, ground squirrels, marmots, mountain goats, grizzly bears, and black bears are all commonly seen in the Canadian Rockies.
Keep your distance from any wildlife and do not feed the animals. Although they look less intimidating than bears, moose and elk can both be very dangerous
When hiking, be sure to carry bear spray in case of an accidental run-in with a bear. Remember, grizzly bears are large brown bears with a hump on their back. Grizzlies are not to be antagonized, as they are fighters and will engage you if you challenge the bear. Instead, it is recommended to play dead if you do not have bear spray to help you get away from the bear. On the contrary, black bears are also the color brown (confusing I know!) but do not have a large hump on their back. They tend to be smaller than grizzlies, and are also less aggressive. If challenged by a brown bear, many suggest getting defensive and making yourself big and ready to fight if you do not have bear spray to help you get a safe distance away from the bear.
Navigation
Transportation and Accommodations
Things to do and see
Food and Drinks